DDR爱好者之家 Design By 杰米
最终效果

1、先来分解一下甜椒的结构,大致需要分为下面三大部分。

<图1>
2、我们从主体部分开始制作,需要完成的效果如下图。

<图2>
3、新建一个组,用钢笔勾出主体部分的轮廓,转为选区后给组添加图层蒙版,如下图。
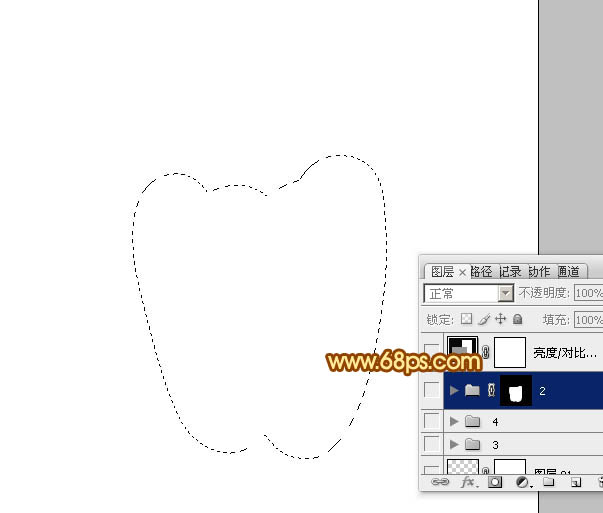
<图3>
4、在组里新建一个图层填充橙黄色:#FEC400作为底色,如下图。
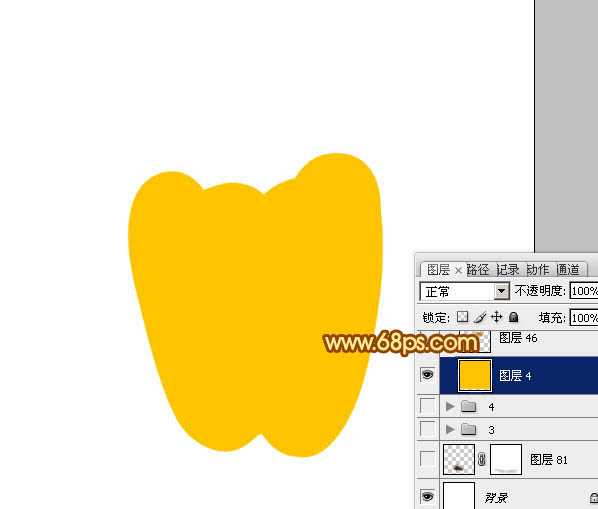
<图4>
5、根据需要给右上角加上一些简单的褐色暗部,边缘部分加上一些淡黄色高光,如图5,6。
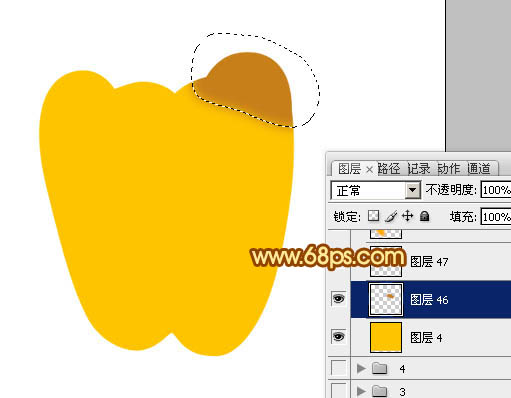
<图5>
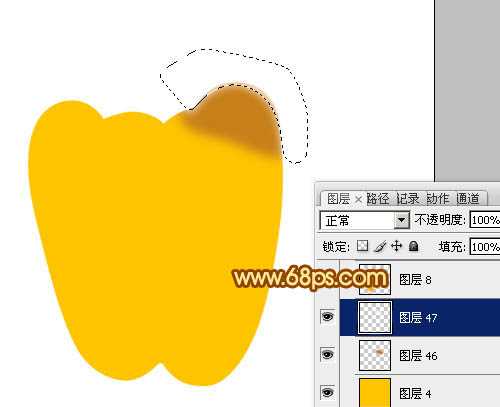
<图6>
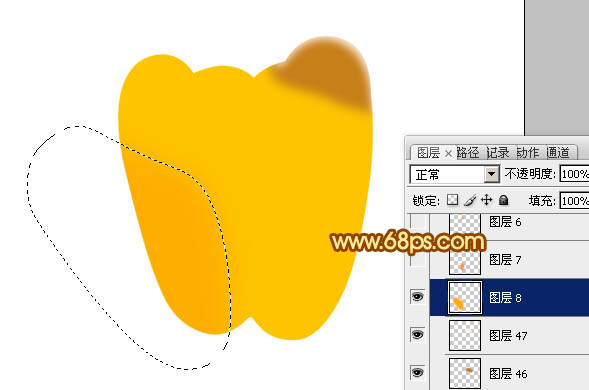
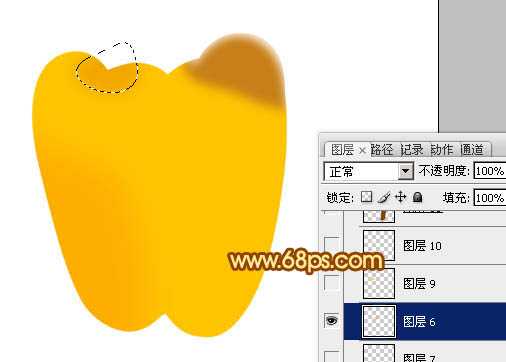
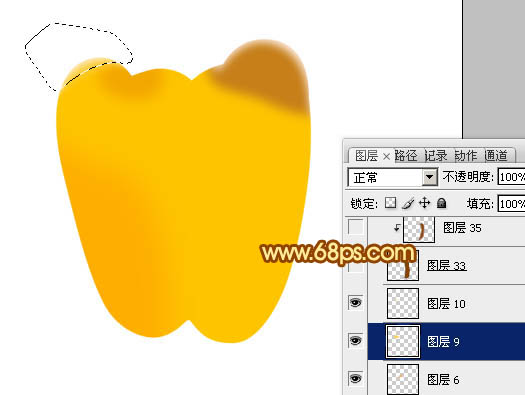
6、新建图层,左下角及左上角部分用画笔涂上橙红色暗部,边缘部分添加一些高光,如图7 - 9。
<图7>
<图8>
<图9>
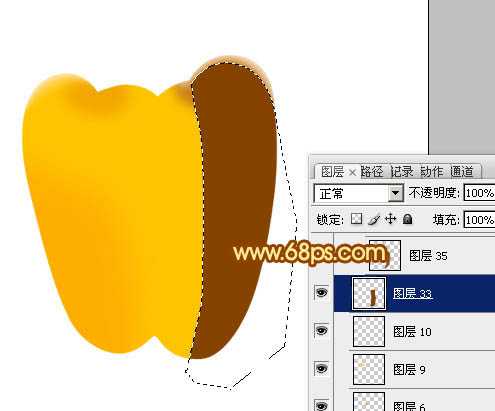
7、新建图层,现在开始从右至左制作甜椒的表面。用钢笔勾出下图所示的选区,填充黄褐色:#844400。
<图10>
8、新建图层,按Ctrl + Alt + G 创建剪贴蒙版,然后在当前图层下面新建一个图层,用钢笔勾出下图所示的选区,羽化10个像素后填充比底色稍亮的褐色。
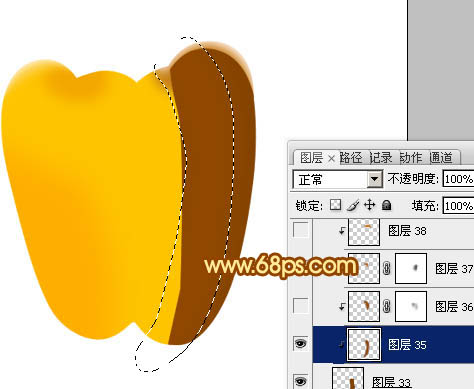
<图11>
9、新建一个图层,用钢笔勾出下图所示的选区,羽化8个像素后填充稍亮的褐色。
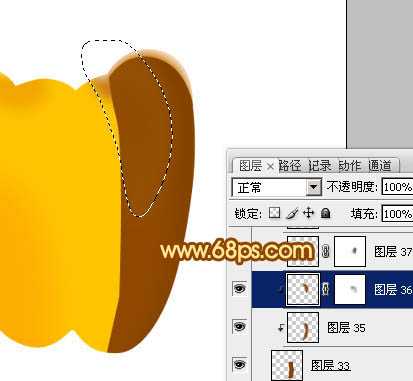
<图12>
10、新建一个图层,同上的方法给顶部及右侧边缘加上高光,局部需要用减淡工具增强高光,过程如图13 - 15。
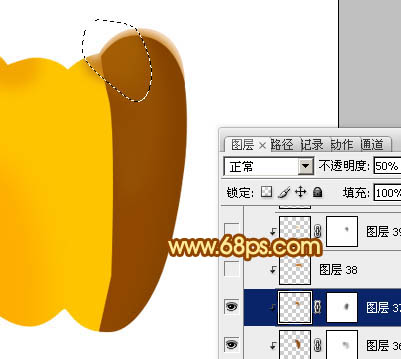
<图13>
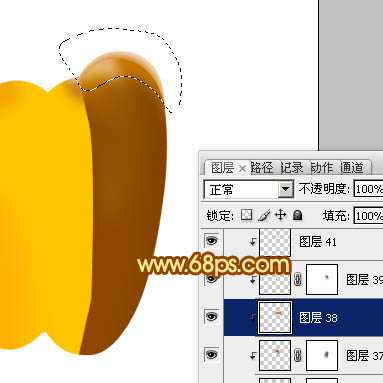
<图14>
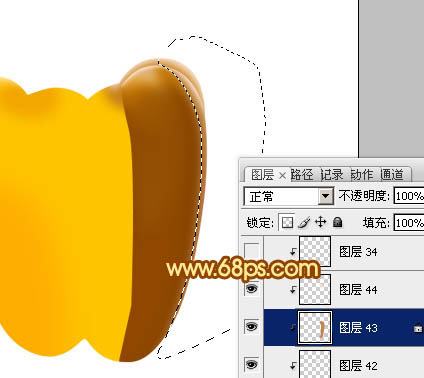
<图15>
上一页12 下一页 阅读全文

1、先来分解一下甜椒的结构,大致需要分为下面三大部分。

<图1>
2、我们从主体部分开始制作,需要完成的效果如下图。

<图2>
3、新建一个组,用钢笔勾出主体部分的轮廓,转为选区后给组添加图层蒙版,如下图。

<图3>
4、在组里新建一个图层填充橙黄色:#FEC400作为底色,如下图。

<图4>
5、根据需要给右上角加上一些简单的褐色暗部,边缘部分加上一些淡黄色高光,如图5,6。

<图5>

<图6>
6、新建图层,左下角及左上角部分用画笔涂上橙红色暗部,边缘部分添加一些高光,如图7 - 9。

<图7>

<图8>

<图9>
7、新建图层,现在开始从右至左制作甜椒的表面。用钢笔勾出下图所示的选区,填充黄褐色:#844400。

<图10>
8、新建图层,按Ctrl + Alt + G 创建剪贴蒙版,然后在当前图层下面新建一个图层,用钢笔勾出下图所示的选区,羽化10个像素后填充比底色稍亮的褐色。

<图11>
9、新建一个图层,用钢笔勾出下图所示的选区,羽化8个像素后填充稍亮的褐色。

<图12>
10、新建一个图层,同上的方法给顶部及右侧边缘加上高光,局部需要用减淡工具增强高光,过程如图13 - 15。

<图13>

<图14>

<图15>
上一页12 下一页 阅读全文
DDR爱好者之家 Design By 杰米
广告合作:本站广告合作请联系QQ:858582 申请时备注:广告合作(否则不回)
免责声明:本站资源来自互联网收集,仅供用于学习和交流,请遵循相关法律法规,本站一切资源不代表本站立场,如有侵权、后门、不妥请联系本站删除!
免责声明:本站资源来自互联网收集,仅供用于学习和交流,请遵循相关法律法规,本站一切资源不代表本站立场,如有侵权、后门、不妥请联系本站删除!
DDR爱好者之家 Design By 杰米
暂无评论...
更新日志
2025年02月24日
2025年02月24日
- 小骆驼-《草原狼2(蓝光CD)》[原抓WAV+CUE]
- 群星《欢迎来到我身边 电影原声专辑》[320K/MP3][105.02MB]
- 群星《欢迎来到我身边 电影原声专辑》[FLAC/分轨][480.9MB]
- 雷婷《梦里蓝天HQⅡ》 2023头版限量编号低速原抓[WAV+CUE][463M]
- 群星《2024好听新歌42》AI调整音效【WAV分轨】
- 王思雨-《思念陪着鸿雁飞》WAV
- 王思雨《喜马拉雅HQ》头版限量编号[WAV+CUE]
- 李健《无时无刻》[WAV+CUE][590M]
- 陈奕迅《酝酿》[WAV分轨][502M]
- 卓依婷《化蝶》2CD[WAV+CUE][1.1G]
- 群星《吉他王(黑胶CD)》[WAV+CUE]
- 齐秦《穿乐(穿越)》[WAV+CUE]
- 发烧珍品《数位CD音响测试-动向效果(九)》【WAV+CUE】
- 邝美云《邝美云精装歌集》[DSF][1.6G]
- 吕方《爱一回伤一回》[WAV+CUE][454M]
