本文介绍vue.js组件,具体如下:
5.2 组件通信
尽管子组件可以用this.$parent访问它的父组件及其父链上任意的实例,不过子组件应当避免直接依赖父组件的数据,尽量显式地使用 props 传递数据。另外,在子组件中修改父组件的状态是非常糟糕的做法,因为:
1.这让父组件与子组件紧密地耦合;
2.只看父组件,很难理解父组件的状态。因为它可能被任意子组件修改!理想情况下,只有组件自己能修改它的状态。
每个Vue实例都是一个事件触发器:
- $on()——监听事件。
- $emit()——把事件沿着作用域链向上派送。(触发事件)
- $dispatch()——派发事件,事件沿着父链冒泡。
- $broadcast()——广播事件,事件向下传导给所有的后代。
5.2.1 监听与触发
v-on监听自定义事件:
<!DOCTYPE html>
<html>
<head>
<meta charset="UTF-8">
<title></title>
</head>
<body>
<!--子组件模板-->
<template id="child-template">
<input v-model="msg" />
<button v-on:click="notify">Dispatch Event</button>
</template>
<!--父组件模板-->
<div id="events-example">
<p>Messages: {{ messages | json }}</p>
<child v-on:child-msg="handleIt"></child>
</div>
</body>
<script src="/UploadFiles/2021-04-02/vue.js">
父组件可以在使用子组件的地方直接用 v-on 来监听子组件触发的事件:
<!DOCTYPE html>
<html>
<head>
<meta charset="UTF-8">
<title></title>
</head>
<body>
<div id="counter-event-example">
<p>{{ total }}</p>
<button-counter v-on:increment="incrementTotal"></button-counter>
<button-counter v-on:increment="incrementTotal"></button-counter>
</div>
</body>
<script src="/UploadFiles/2021-04-02/vue.js">


在某个组件的根元素上监听一个原生事件。可以使用 .native 修饰v-on 。例如:
<my-component v-on:click.native="doTheThing"></my-component>
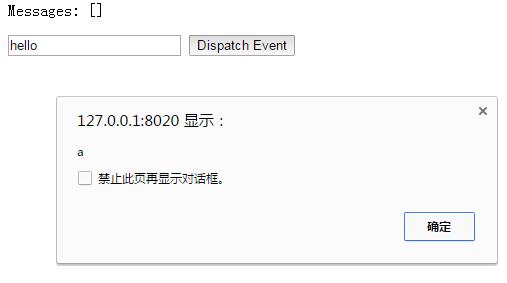
5.2.2 派发事件——$dispatch()
<!DOCTYPE html>
<html>
<head>
<meta charset="UTF-8">
<title></title>
</head>
<body>
<div id="app">
<p>Messages: {{ messages | json }}</p>
<child-component></child-component>
</div>
<template id="child-component">
<input v-model="msg" />
<button v-on:click="notify">Dispatch Event</button>
</template>
<script src="/UploadFiles/2021-04-02/vue.js">
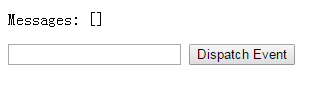


- 子组件的button元素绑定了click事件,该事件指向notify方法
- 子组件的notify方法在处理时,调用了$dispatch,将事件派发到父组件的child-msg事件,并给该该事件提供了一个msg参数
- 父组件的events选项中定义了child-msg事件,父组件接收到子组件的派发后,调用child-msg事件。
5.2.3 广播事件——$broadcast()
<!DOCTYPE html>
<html>
<head>
<meta charset="UTF-8">
<title></title>
</head>
<body>
<div id="app">
<input v-model="msg" />
<button v-on:click="notify">Broadcast Event</button>
<child-component></child-component>
</div>
<template id="child-component">
<ul>
<li v-for="item in messages">
父组件录入了信息:{{ item }}
</li>
</ul>
</template>
<script src="/UploadFiles/2021-04-02/vue.js">
和派发事件相反。前者在子组件绑定,调用$dispatch派发到父组件;后者在父组件中绑定,调用$broadcast广播到子组件。
5.2.4 父子组件之间的访问
- 父组件访问子组件:使用$children或$refs
- 子组件访问父组件:使用$parent
- 子组件访问根组件:使用$root
$children:
<!DOCTYPE html>
<html>
<head>
<meta charset="UTF-8">
<title></title>
</head>
<body>
<div id="app">
<parent-component></parent-component>
</div>
<template id="parent-component">
<child-component1></child-component1>
<child-component2></child-component2>
<button v-on:click="showChildComponentData">显示子组件的数据</button>
</template>
<template id="child-component1">
<h2>This is child component 1</h2>
</template>
<template id="child-component2">
<h2>This is child component 2</h2>
</template>
<script src="/UploadFiles/2021-04-02/vue.js">


$ref可以给子组件指定索引ID:
<!DOCTYPE html>
<html>
<head>
<meta charset="UTF-8">
<title></title>
</head>
<body>
<div id="app">
<parent-component></parent-component>
</div>
<template id="parent-component">
<!--<child-component1></child-component1>
<child-component2></child-component2>-->
<child-component1 v-ref:cc1></child-component1>
<child-component2 v-ref:cc2></child-component2>
<button v-on:click="showChildComponentData">显示子组件的数据</button>
</template>
<template id="child-component1">
<h2>This is child component 1</h2>
</template>
<template id="child-component2">
<h2>This is child component 2</h2>
</template>
<script src="/UploadFiles/2021-04-02/vue.js">
效果与$children相同。
$parent:
<!DOCTYPE html>
<html>
<head>
<meta charset="UTF-8">
<title></title>
</head>
<body>
<div id="app">
<parent-component></parent-component>
</div>
<template id="parent-component">
<child-component></child-component>
</template>
<template id="child-component">
<h2>This is a child component</h2>
<button v-on:click="showParentComponentData">显示父组件的数据</button>
</template>
<script src="/UploadFiles/2021-04-02/vue.js">

如开篇所提,不建议在子组件中修改父组件的状态。
5.2.5 非父子组件通信
有时候非父子关系的组件也需要通信。在简单的场景下,使用一个空的 Vue 实例作为中央事件总线:
var bus = new Vue()
// 触发组件 A 中的事件
bus.$emit('id-selected', 1)
// 在组件 B 创建的钩子中监听事件
bus.$on('id-selected', function (id) {
// ...
})
在更多复杂的情况下,可以考虑使用专门的 状态管理模式。
以上就是本文的全部内容,希望对大家的学习有所帮助,也希望大家多多支持。
DDR爱好者之家 Design By 杰米
广告合作:本站广告合作请联系QQ:858582 申请时备注:广告合作(否则不回)
免责声明:本站资源来自互联网收集,仅供用于学习和交流,请遵循相关法律法规,本站一切资源不代表本站立场,如有侵权、后门、不妥请联系本站删除!
DDR爱好者之家 Design By 杰米
暂无评论...


稳了!魔兽国服回归的3条重磅消息!官宣时间再确认!
昨天有一位朋友在大神群里分享,自己亚服账号被封号之后居然弹出了国服的封号信息对话框。
这里面让他访问的是一个国服的战网网址,com.cn和后面的zh都非常明白地表明这就是国服战网。
而他在复制这个网址并且进行登录之后,确实是网易的网址,也就是我们熟悉的停服之后国服发布的暴雪游戏产品运营到期开放退款的说明。这是一件比较奇怪的事情,因为以前都没有出现这样的情况,现在突然提示跳转到国服战网的网址,是不是说明了简体中文客户端已经开始进行更新了呢?
更新日志
- 小骆驼-《草原狼2(蓝光CD)》[原抓WAV+CUE]
- 群星《欢迎来到我身边 电影原声专辑》[320K/MP3][105.02MB]
- 群星《欢迎来到我身边 电影原声专辑》[FLAC/分轨][480.9MB]
- 雷婷《梦里蓝天HQⅡ》 2023头版限量编号低速原抓[WAV+CUE][463M]
- 群星《2024好听新歌42》AI调整音效【WAV分轨】
- 王思雨-《思念陪着鸿雁飞》WAV
- 王思雨《喜马拉雅HQ》头版限量编号[WAV+CUE]
- 李健《无时无刻》[WAV+CUE][590M]
- 陈奕迅《酝酿》[WAV分轨][502M]
- 卓依婷《化蝶》2CD[WAV+CUE][1.1G]
- 群星《吉他王(黑胶CD)》[WAV+CUE]
- 齐秦《穿乐(穿越)》[WAV+CUE]
- 发烧珍品《数位CD音响测试-动向效果(九)》【WAV+CUE】
- 邝美云《邝美云精装歌集》[DSF][1.6G]
- 吕方《爱一回伤一回》[WAV+CUE][454M]