DDR爱好者之家 Design By 杰米
原图

<点小图查看大图>
最终效果

<点小图查看大图>
1、打开原图素材,按Ctrl + Alt + ~ 调出高光选区,新建一个图层填充颜色:#E7BEBE,图层混合模式改为“柔光”,图层不透明度改为:50%,加上图层蒙版,只保留人物部分,其它部分用黑色画笔擦掉。

<图1>
2、创建可选颜色调整图层,参数设置如图2 - 4,效果如图5。

<图2>
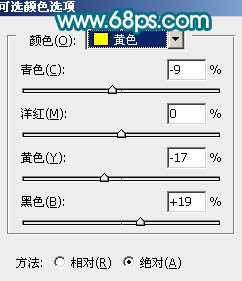
<图3>

<图4>

<图5>
3、把当前可选颜色调整图层复制一层,图层混合模式改为“正片叠底”,图层不透明度改为:10%,效果如下图。
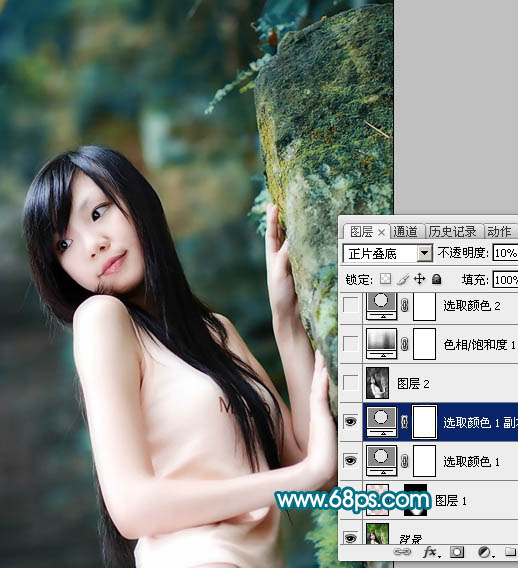
<图6>
4、新建一个图层,按Ctrl + Alt + Shift + E 盖印图层。执行:滤镜 > 模糊 > 高斯模糊,数值为5,确定后把图层混合模式改为“柔光”,图层不透明度改为:30%,效果如下图。
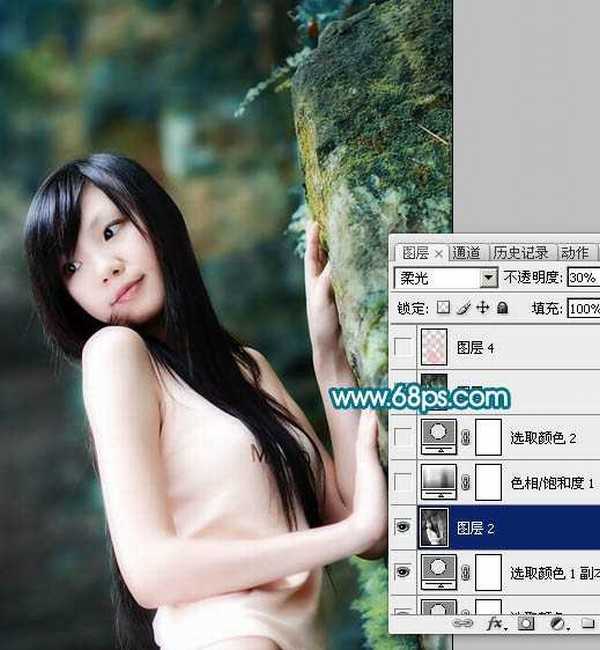
<图7>
5、创建色相/饱和度调整图层,参数设置如图8,适当降低全图的饱和度,效果如图9。
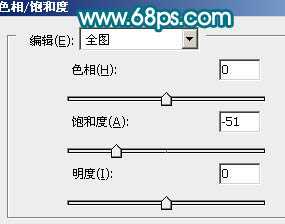
<图8>
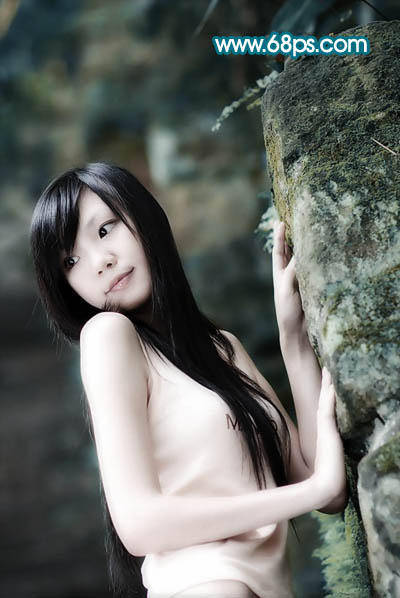
<图9>
6、创建创建可选颜色调整图层,参数设置如图10,11,效果如图12。

<图10>

<图11>
上一页12 下一页 阅读全文

<点小图查看大图>
最终效果

<点小图查看大图>
1、打开原图素材,按Ctrl + Alt + ~ 调出高光选区,新建一个图层填充颜色:#E7BEBE,图层混合模式改为“柔光”,图层不透明度改为:50%,加上图层蒙版,只保留人物部分,其它部分用黑色画笔擦掉。

<图1>
2、创建可选颜色调整图层,参数设置如图2 - 4,效果如图5。

<图2>

<图3>

<图4>

<图5>
3、把当前可选颜色调整图层复制一层,图层混合模式改为“正片叠底”,图层不透明度改为:10%,效果如下图。

<图6>
4、新建一个图层,按Ctrl + Alt + Shift + E 盖印图层。执行:滤镜 > 模糊 > 高斯模糊,数值为5,确定后把图层混合模式改为“柔光”,图层不透明度改为:30%,效果如下图。

<图7>
5、创建色相/饱和度调整图层,参数设置如图8,适当降低全图的饱和度,效果如图9。

<图8>

<图9>
6、创建创建可选颜色调整图层,参数设置如图10,11,效果如图12。

<图10>

<图11>
上一页12 下一页 阅读全文
DDR爱好者之家 Design By 杰米
广告合作:本站广告合作请联系QQ:858582 申请时备注:广告合作(否则不回)
免责声明:本站资源来自互联网收集,仅供用于学习和交流,请遵循相关法律法规,本站一切资源不代表本站立场,如有侵权、后门、不妥请联系本站删除!
免责声明:本站资源来自互联网收集,仅供用于学习和交流,请遵循相关法律法规,本站一切资源不代表本站立场,如有侵权、后门、不妥请联系本站删除!
DDR爱好者之家 Design By 杰米
暂无评论...
RTX 5090要首发 性能要翻倍!三星展示GDDR7显存
三星在GTC上展示了专为下一代游戏GPU设计的GDDR7内存。
首次推出的GDDR7内存模块密度为16GB,每个模块容量为2GB。其速度预设为32 Gbps(PAM3),但也可以降至28 Gbps,以提高产量和初始阶段的整体性能和成本效益。
据三星表示,GDDR7内存的能效将提高20%,同时工作电压仅为1.1V,低于标准的1.2V。通过采用更新的封装材料和优化的电路设计,使得在高速运行时的发热量降低,GDDR7的热阻比GDDR6降低了70%。
更新日志
2025年02月22日
2025年02月22日
- 小骆驼-《草原狼2(蓝光CD)》[原抓WAV+CUE]
- 群星《欢迎来到我身边 电影原声专辑》[320K/MP3][105.02MB]
- 群星《欢迎来到我身边 电影原声专辑》[FLAC/分轨][480.9MB]
- 雷婷《梦里蓝天HQⅡ》 2023头版限量编号低速原抓[WAV+CUE][463M]
- 群星《2024好听新歌42》AI调整音效【WAV分轨】
- 王思雨-《思念陪着鸿雁飞》WAV
- 王思雨《喜马拉雅HQ》头版限量编号[WAV+CUE]
- 李健《无时无刻》[WAV+CUE][590M]
- 陈奕迅《酝酿》[WAV分轨][502M]
- 卓依婷《化蝶》2CD[WAV+CUE][1.1G]
- 群星《吉他王(黑胶CD)》[WAV+CUE]
- 齐秦《穿乐(穿越)》[WAV+CUE]
- 发烧珍品《数位CD音响测试-动向效果(九)》【WAV+CUE】
- 邝美云《邝美云精装歌集》[DSF][1.6G]
- 吕方《爱一回伤一回》[WAV+CUE][454M]
